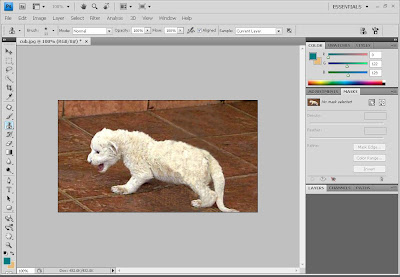
 This tutorial is only intended for removing unwanted object using Clone stamp tool. For viewers, the result on this tutorial would need an additional tutorial for photo manipulation, but let us just focus first on removing the unwanted object.
Step 1:
- Simply drag an image you want to edit. And choose the "clone stamp tool icon" located on the left side of the photoshop.
 Step 2:
- When you are done choosing the clone stamp tool icon, adjust the brush size on where you are comfortable.
- On this photo you have to remove the gray bar. Choose a part on the floor by pressing "alt + left click" and release the mouse. Try to brush it on the unwanted object on your photo. For example here, the upper part of the gray bar.
 Step 3:
- In the middle part, you have to choose a part on the dog or any part on your image that would correlate on the unwanted part, by pressing again "alt + left click" and release. And again brush it to the part of unwanted object.
 Step 4:
 - On this result you need to do photo manipulation. In which I will post on my next tutorial. You need to do a simple image first that has unwanted object that should be removed..
I hope you already learn the steps in removing unwanted objects from your photo in using the "Clone Stamp Tool" :) Watch out for more tutorials to be posted. Thank you!


0 comments:
Post a Comment